Digital signatures in practice
You can have documents signed digitally via Regelneef. This article uses an example to explain how this works in practice.
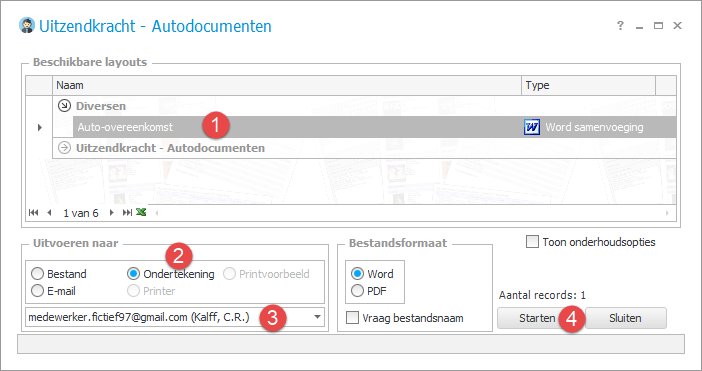
In most cases, the document to be signed (for example, a contract) will already have been generated by Regelneef via the layout system. For this reason, a Signing option is available under Output to on the layout screen. The screenshot below shows the car document layouts for employee Kalff, and the signing process can be initiated as follows:
Select a layout (it is also possible to combine multiple layouts);
Select Signing;
Select the correct email address (Regelneef automatically displays the relevant addresses here; this usually does not need to be changed);
Click Start.
Once started, a screen appears showing the new signing request before it is actually sent. Various details on this screen can still be adjusted if required. The screen consists of four sections:
File to send
This is the document that Regelneef has just merged. If you wish, you can change the name of the document, as it will appear to the signatory. You can also view or even edit the document here.Recipient
In this case, this field shows the employee and their email address. This is where the request will be sent. By default, the signing action is set to Apply signature.Sender
By default, this is the recruitment consultant as logged into Regelneef. In the example below, the option has been selected to have the recruitment consultant sign as well.Email message to signatory
Each signatory receives the request via email. This email can be (partially) personalised via this section. If these fields are left blank, a clear message is automatically generated by SignRequest. The language of this message can be configured. In the example below, only the subject line has been customised.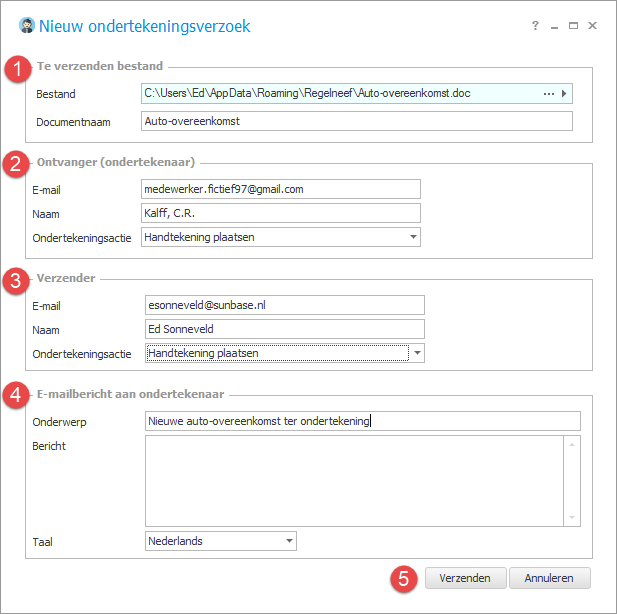
Once sent, the status appears as a new entry on the Signing requests screen. Hovering the mouse over the status displays a pop-up with detailed information.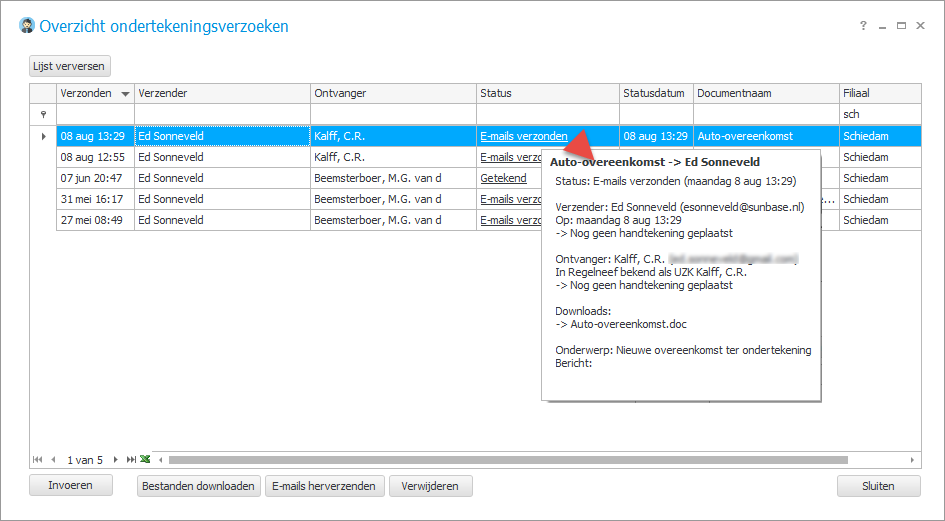
The email received by a signatory looks as follows. The logo can, of course, be customised for each organisation when activating the signing module within Regelneef.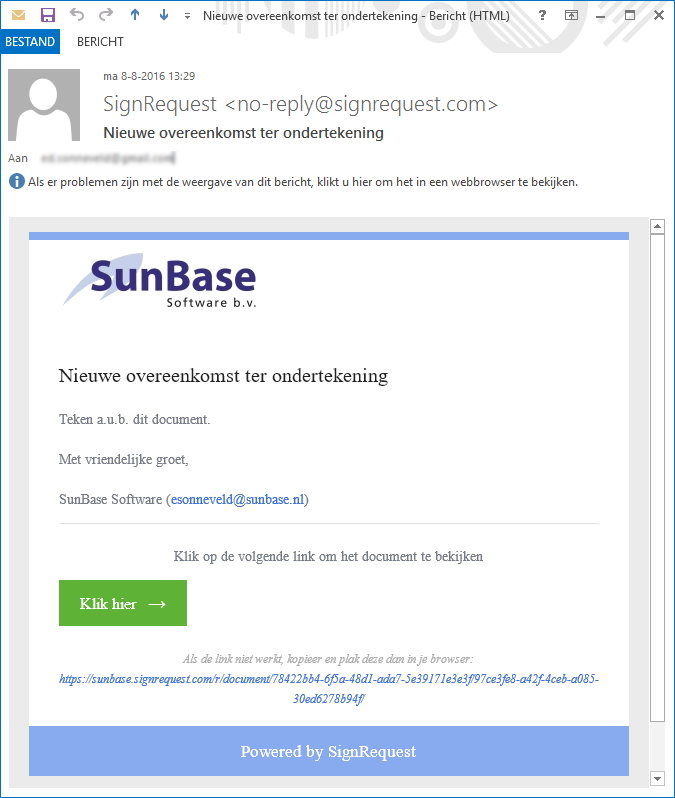
Clicking Click here takes you to the signing section of SignRequest. This web-based system works on many platforms. The following images were taken whilst signing on an Android phone.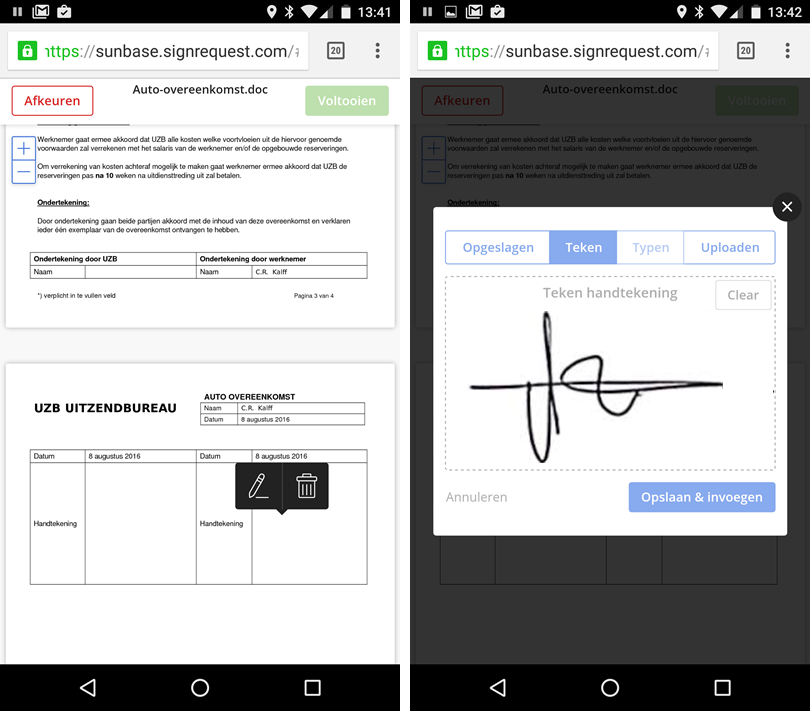
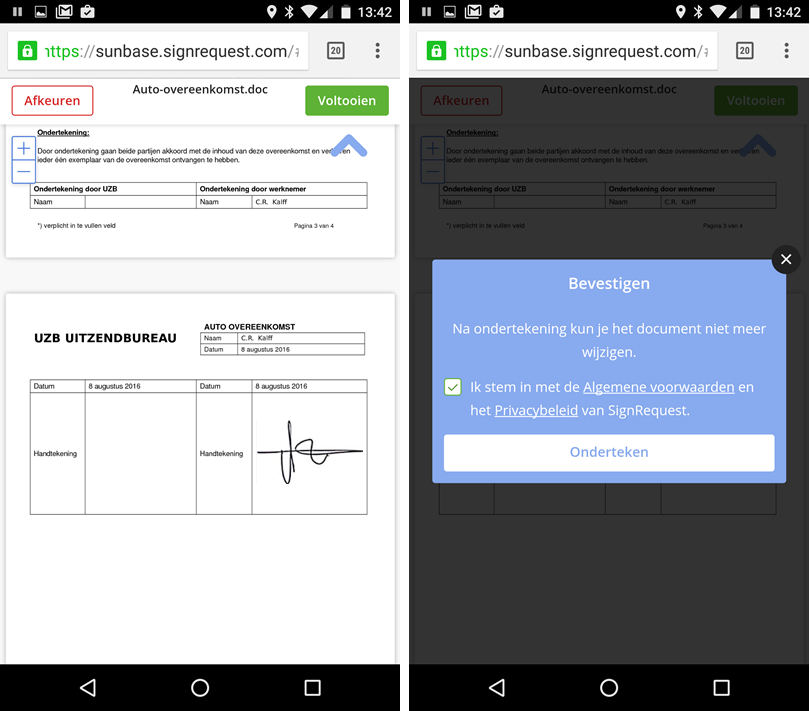
Once the signing is complete, the relevant item in Regelneef is given the status Signed.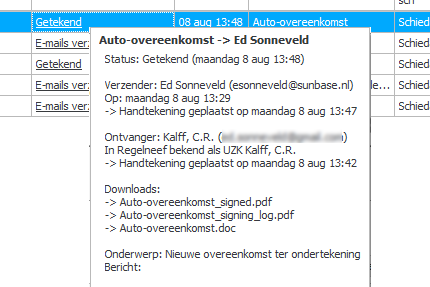
The screen above already shows that there are now several downloads available. Double-clicking on the row makes these available: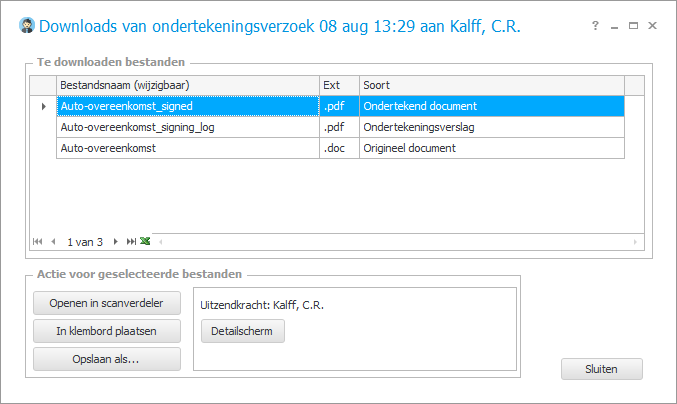
The first document is the signed document, in PDF format. The second document is the signing report. This contains all the relevant details of the signing, such as names, email addresses, IP addresses, signatures, the –optional– SMS verification, etc. The third document is the original document that was sent.
To archive the signed document and the report, Regelneef offers various ways to save these files in the correct location, as shown at the bottom of the screen.
Once the signing process is complete, each signatory will also automatically receive an email containing links to the signed document and the signing report.